
Inside CallPage: Exploring Widget Settings
Once you've signed up for the CallPage trial, you have 14 days to test out the widget with full access to all features. The trial comes with some default settings - which we recommend for the beginning. However, you may want to tailor these settings to better suit your company's individual needs. In this blog post, we've compiled some of the most important default widget settings.
Where do you want the widget to appear?
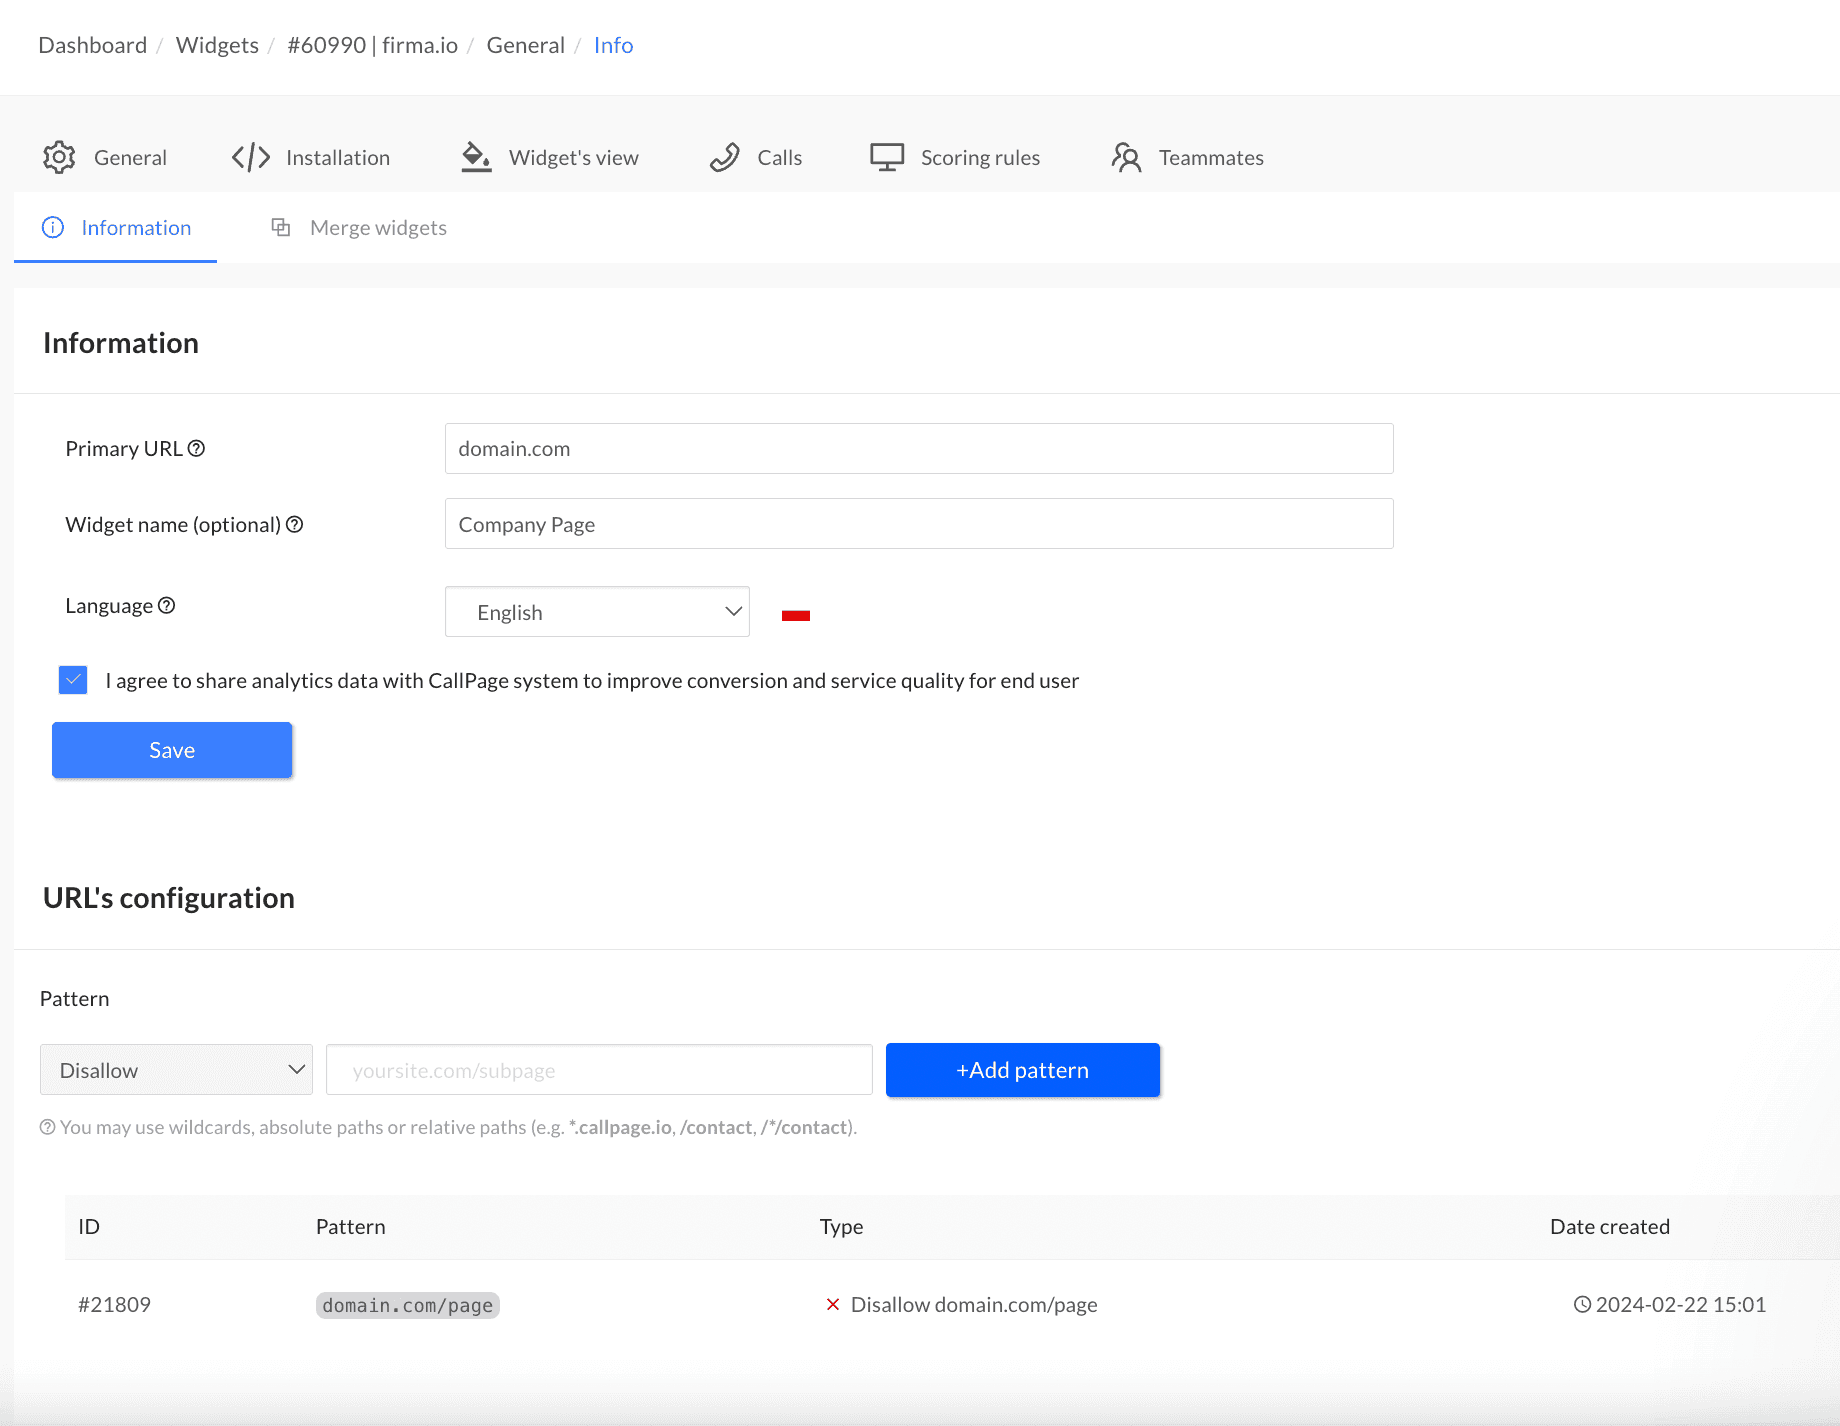
After adding the CallPage installation code to your website, the widget will display across your entire domain. However, there may be a situation where you prefer not to display the widget on certain pages, or perhaps you only want it to appear on select pages. In such cases, you can adjust the settings by clicking the gear icon on the widget and navigating to the 'General' tab. Here, you can easily specify on what pages the widget should or shouldn't be visible.
Our tip: For optimal widget performance, it's best to have it visible on all pages. Limiting the widget's visibility is recommended only for websites with significant traffic, where you want to target specific pages, such as the basket summary page in store.
Read Also: Optimizing CallPage: A Guide to Boosting Calls and Leads
When should the pop-up be displayed?
Scoring Rules is likely a familiar term to you. With CallPage Scoring Rules, you have the power to control when the pop-up invitation will be displayed to a user. In the default settings, CallPage will automatically trigger the pop-up in the following scenarios:
- When a user attempts to leave the website (e.g., Exit Intent pop-up).
- When a user has previously visited your website.
- When a user scrolls at least 1500 pixels on your website.
The aim here is to maximize potential and capture every user behavior scenario. However, you can adjust these settings to better suit your needs. Here, you'll find a comprehensive guide on how to use CallPage Scoring Rules.
In the scoring rules section, you can also determine whether the pop-up should appear only once per session or each time a rule is met, as well as whether the automatic pop up should be displayed on mobile devices. In both cases we recommend leaving the default settings.
How to set call routing rules?
Let’s say you have added 3 phone consultants to your trial account. How does the system decide who to connect the call with? Basically, there are three main ways:
- CallPage will ring all your available team members at once and connect the call to the first one who picks up.
- CallPage will call consultants one by one according to your list order
- CallPage will call consultants one by one in a random order.
So, which way should you go? It depends on what works best for you. During the trial period, we suggest starting with the first option. This way, everyone gets the call simultaneously, increasing the chance that someone will pick up the call.
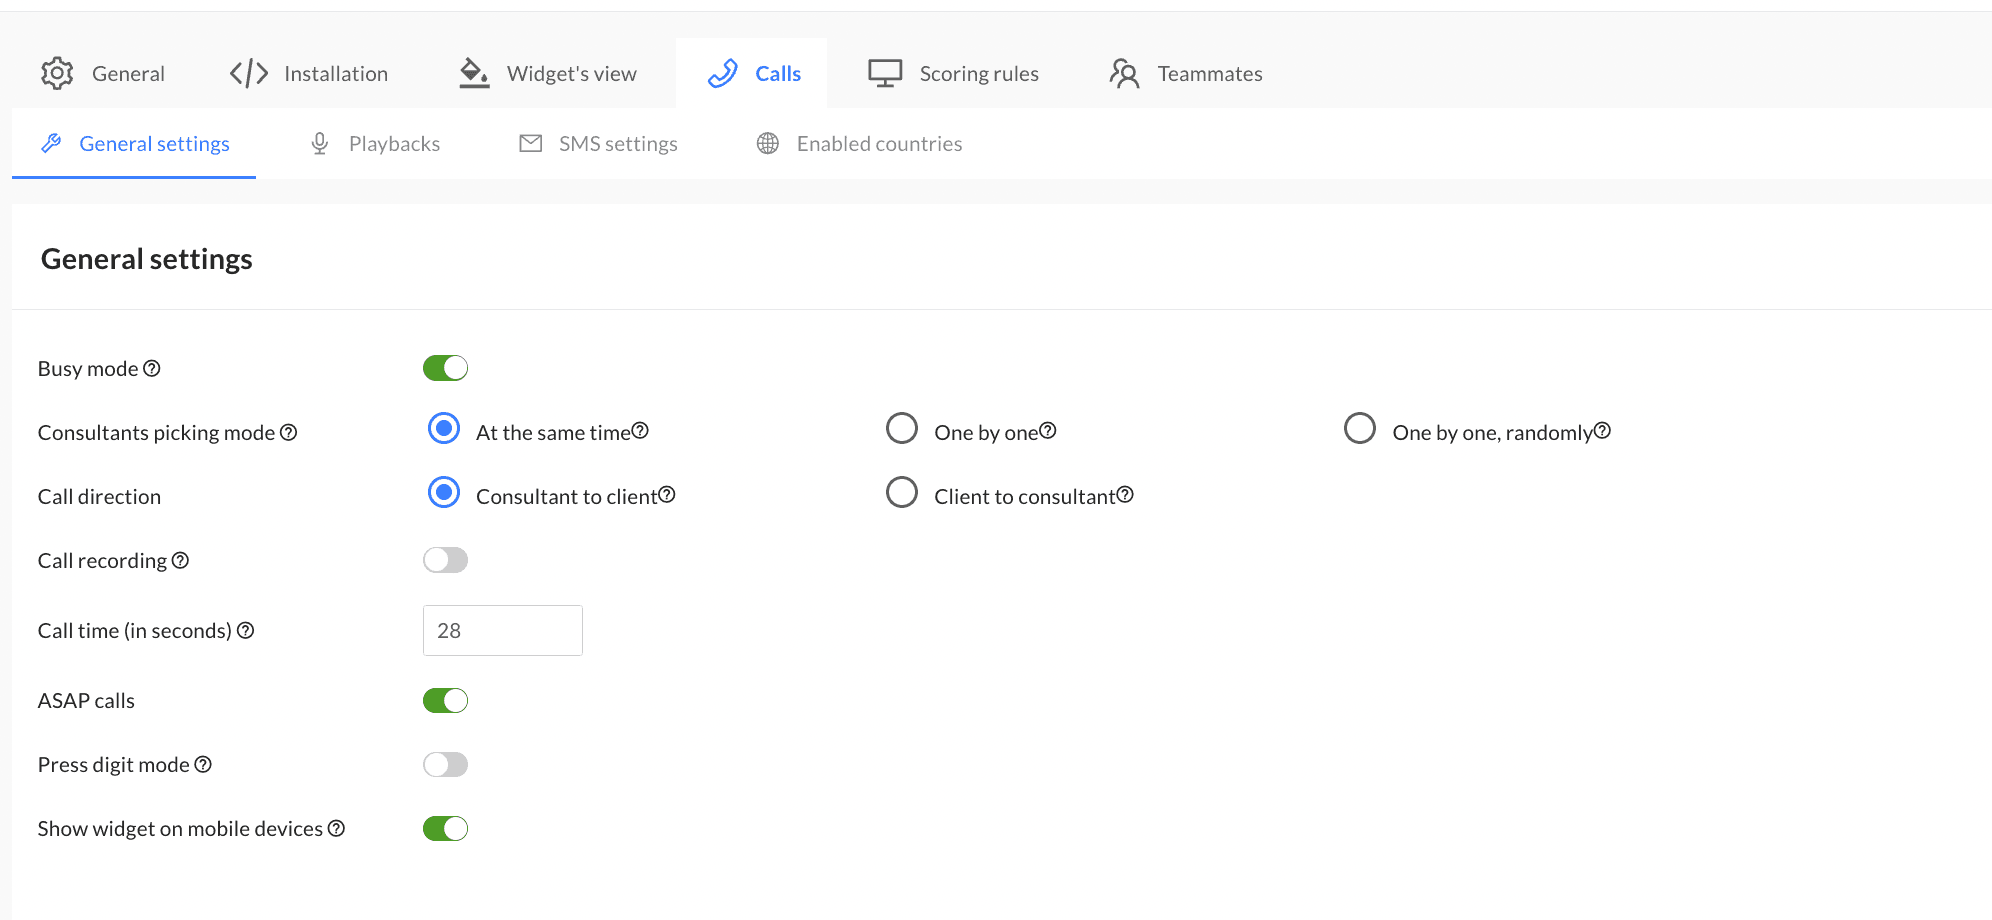
However, there might be situations where different settings work better for you. For example, if you have one main call consultant and the other two are backups, the second option might be preferable. CallPage will try the main contact person first and then move to the backup if needed. The third method is handy if you don't want your team to be bombarded with calls. It spreads the calls out evenly so no one gets overwhelmed.
In this section, you'll find some other cool settings such as the number of call retry attempts and intervals between them, and the connection time (28 seconds). Make sure to review them all to understand your options; tooltips provide handy explanations for each setting.
How to manage call recording?
One of the great perks of using CallPage is that you can record all calls, whether they're inbound or outbound. This feature can level up your sales results and keep your customers happy. Check out our blog post on how to use call recording to improve your customer service. By default, call recording is turned off in the panel due to different country restrictions, but you can easily change this in the call settings tab. Just slide the toggle next to "Call recording" to enable it. You'll find all your recordings stored in the Leads tab.

Read Also: Managing Leads in CallPage — How to Use Internal CallPage CRM
What phone number should be displayed?
In the call settings (see the point on how to set call routing rules), you can also set your Caller ID. However, for security reasons, to set up this feature you have to connect with our team. Also, we recommend setting your Caller ID after purchasing a paid plan. If you'd like to learn more, reach out to us at [email protected].
How to direct calls to different teams?
Imagine you have two branches - one in New York and the other in San Francisco. Depending on where your customer is located, you might want to connect them to different branches. Or if you have two sales teams - one for potential customers and the other for existing customers - you might want to ask the caller if he already is your customer. In both cases, you can use the Department Features. This allows you to simply ask the caller who they'd like to contact, and then CallPage will direct the call to the appropriate team.
To get started with this feature, you'll first need to create groups and organize your consultants into these groups. Then, you can enable the department feature in the settings. For detailed instructions, please visit our Help Center.
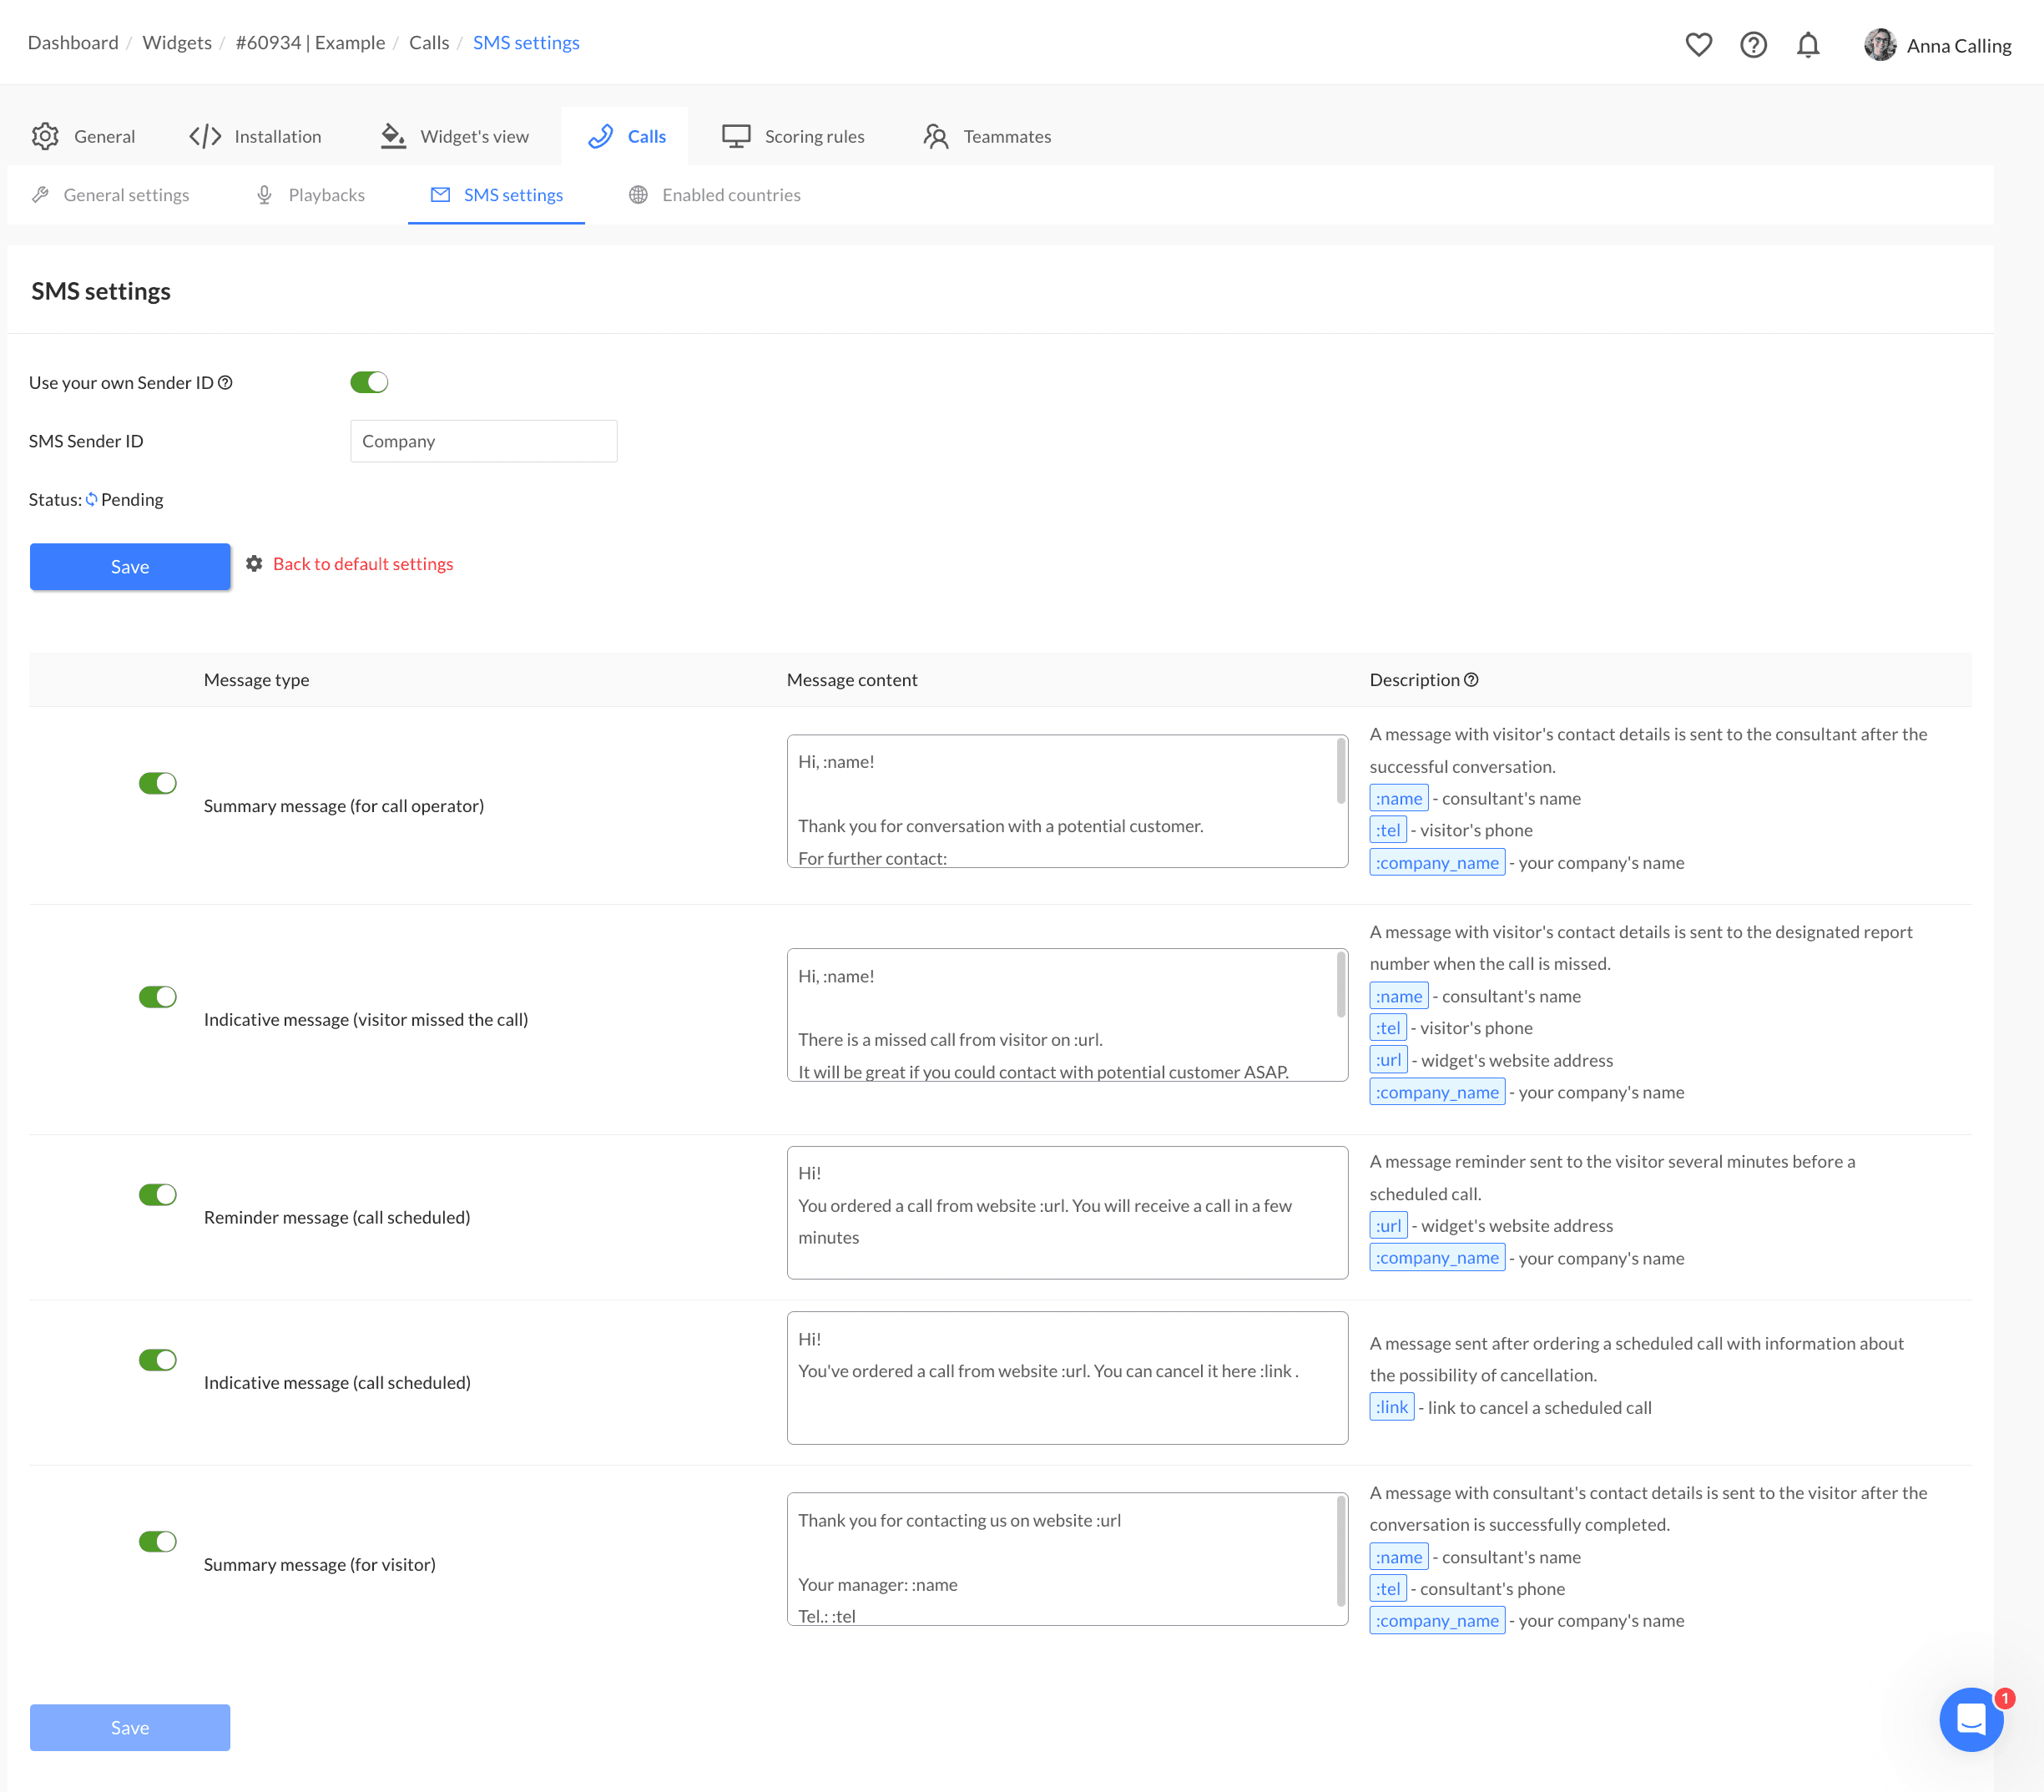
What information should be sent in the SMS after the call?
SMS summaries and notifications are another fantastic feature of CallPage that will keep you on your customer's radar. After each call—whether it was successful, unsuccessful, or scheduled—our system will automatically send important information to the caller. We've already set up default messages, but feel free to personalize them if needed or set your own Sender Name. Simply go to Widget Settings > Calls > SMS Settings.
Our tip: Take advantage of personalization options to include details like your website address or the consultant's name to make the message more personal. If you're offering incentives such as coupons after the call, you can also add the coupon details in the message.
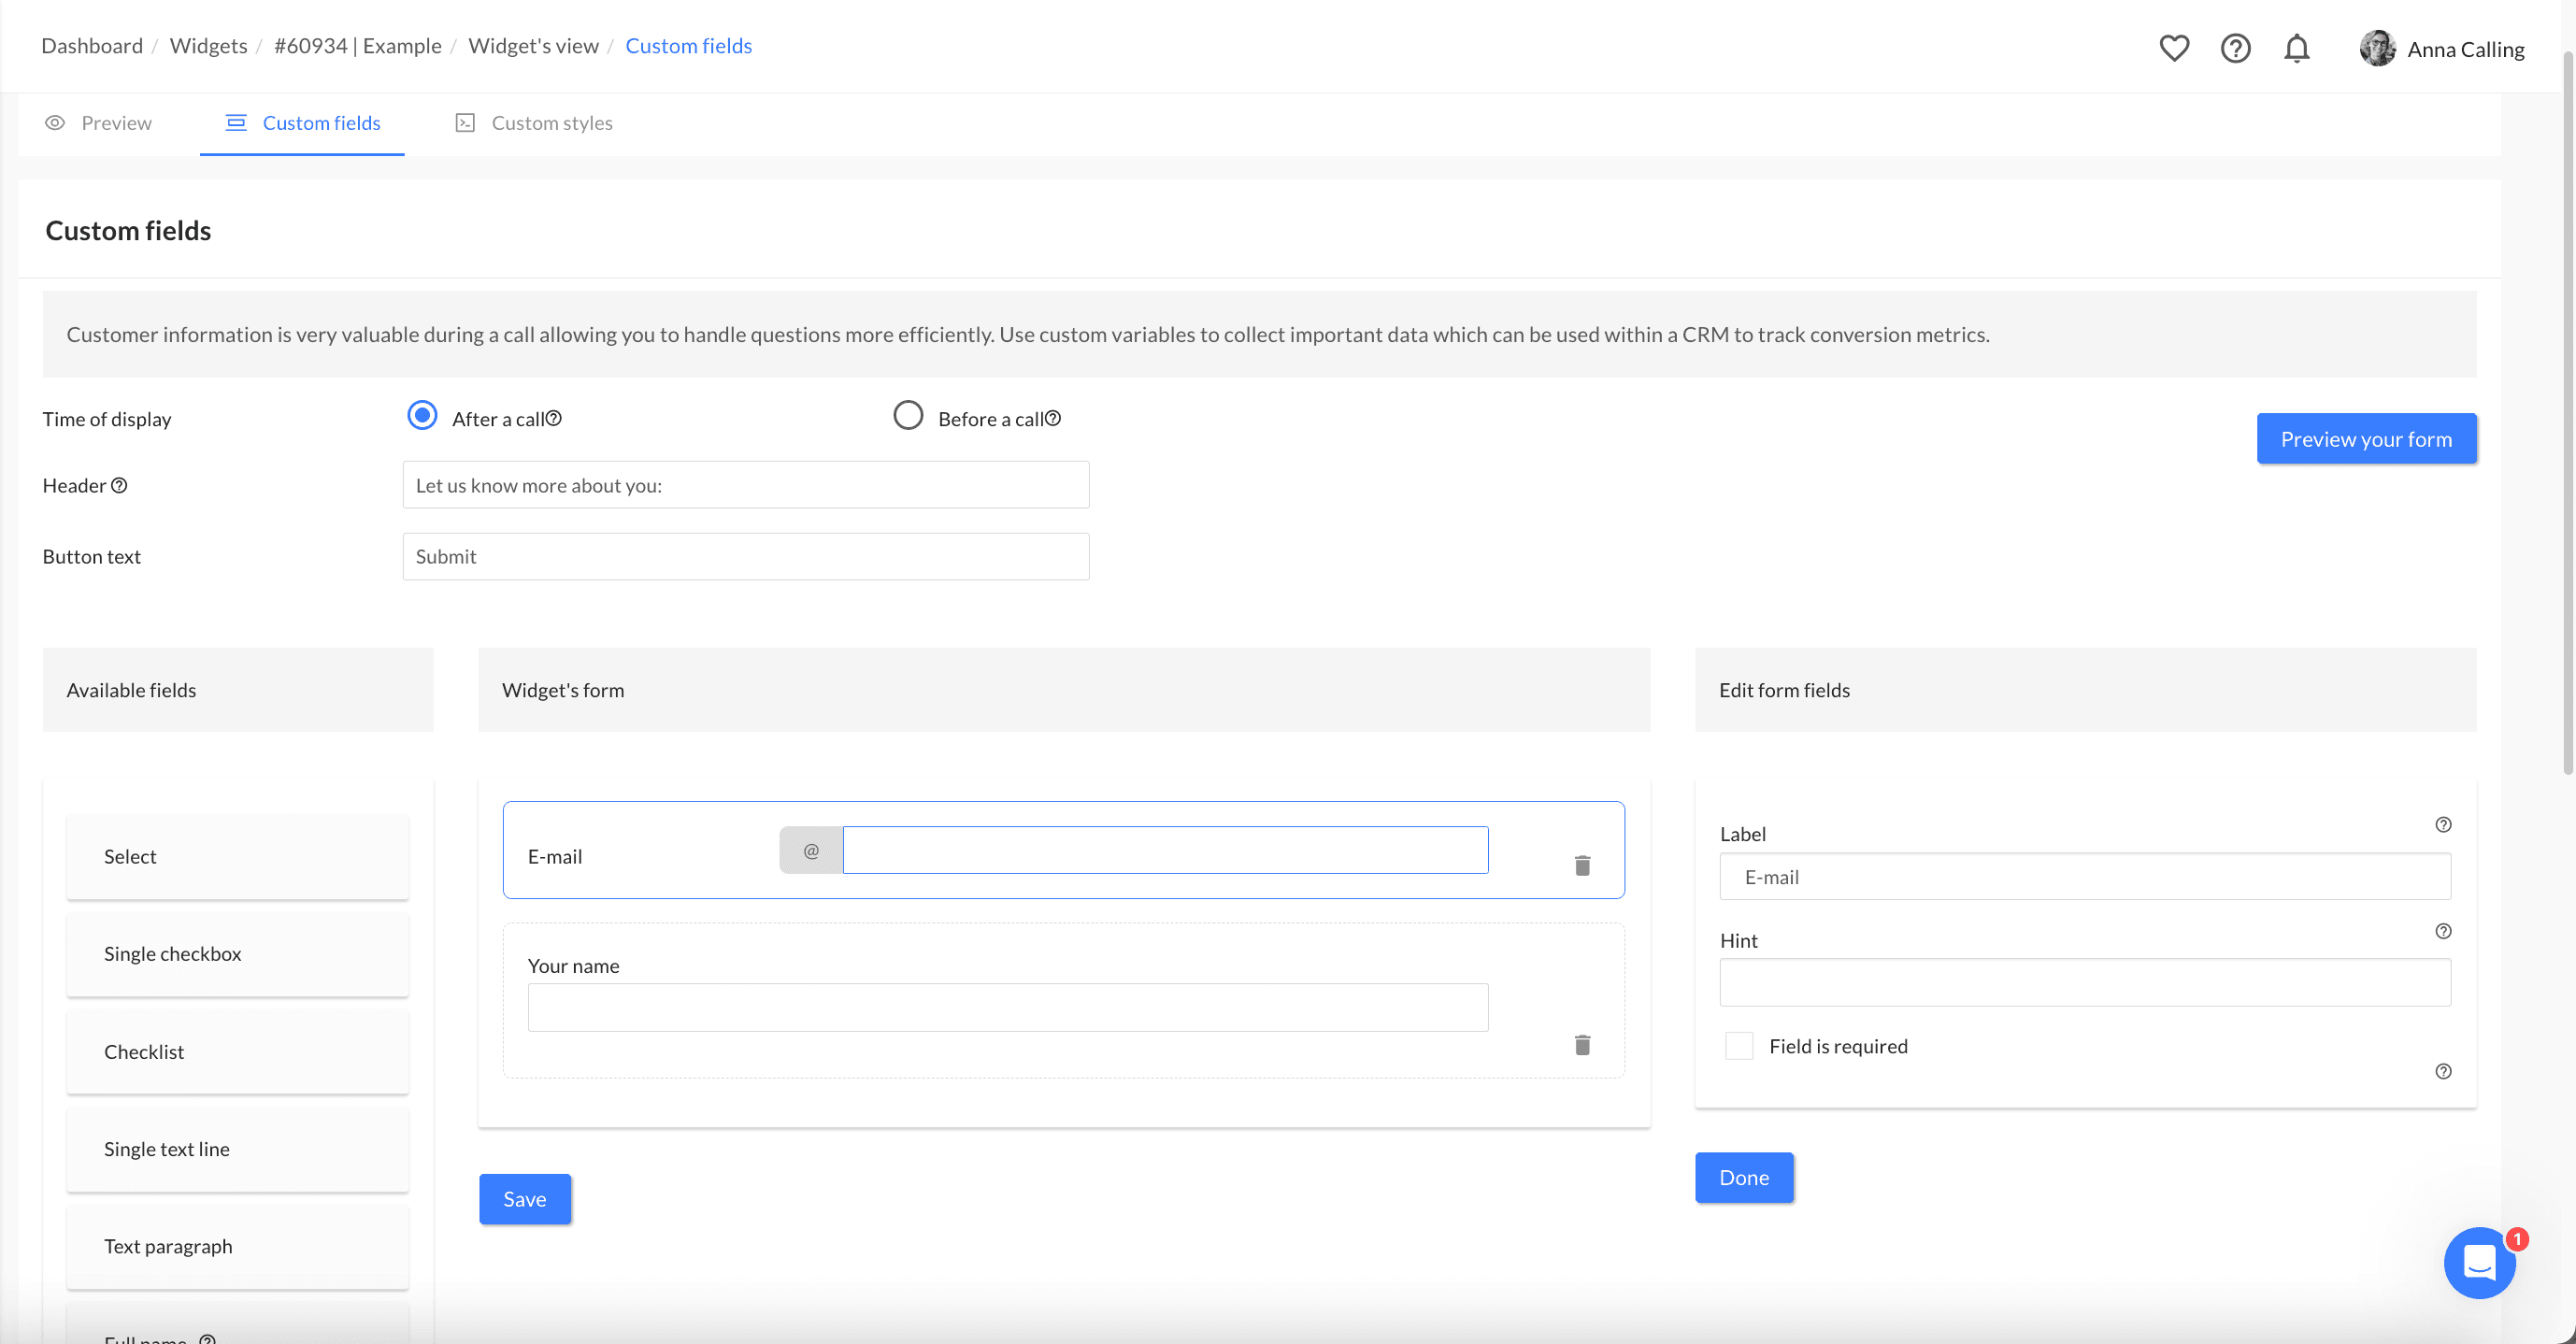
How to add custom fields?
Custom fields are a handy way to collect additional caller details such as email addresses, names, and company names. You can add these fields in two ways:
- After the call
- Before the call
We typically recommend the first option. Requesting details before the call might affect CallPage's conversion rate since the main benefit is its simplicity for the user. Adding too many fields could potentially impact the results. If you'd like to add custom fields, just head to Widgets > Widgets view > Custom Fields.
Read Also: Maximizing Results with Personalized Widgets
Check out other posts
Start generating leads today!
Start a 14-day free trial now,
set up the widget on your site, and see how many more leads you can capture with CallPage
- No credit card required
- 10 minutes set up
- 14 days fully-features free trial